Lab 1: Getting to Know STATA
The purpose of this lab is to get you acquainted with the basics of operating iMacs and to get you started using Stata. By the end of this section you should be able to perform the following tasks:
a) Log in to your computer;
b) Enter data into Stata by hand;
c) Send emails and lab files to your home computer.
Warning: Dealing with a computer is always frustrating. In a class like this, there are varying levels of computer experience, and in a lab like this, even though all of the computers look the same, there are variations in the way things actually behave. Do NOT feel bad if you are confused, or if things dont work out the way this manual says they should, or if you cant seem to figure out what to do as quickly as the person next to you. This is all a natural part of the learning process. There are many resources here to help, and people who want to help you. But first you MUST ASK QUESTIONS!
Activity 1:
Logging in to the system in the lab (for the first time only):
Important: If you are not officially enrolled in the class or officially on the waiting list, you need to see Jose Garcia to get access to the computer lab AFTER you have been officially enrolled. Joses office is located right next to the lab (its the first door to the right as you enter the lab).
1) Type guest
No password is required.
2) Click on Log In.
3) Double click on Continue in the windows User Log In;
4) Youll see two panels; the Guest and Items for Guest. Under the Items for Guest panel, double click on the file called Winter 2001 Roster.url
5) Look for your name. Once you find it, you will see a five-digit number next to it.
6) Write down this number on a piece of paper and keep it on a safe place throughout the quarter. This five-digit number is your lab ID.
7) Up on your screen, click on File and go to Quit to exit Internet Explorer.
8) You should see on your screen the Guest and Items for Guest panels. Click on Special and go to Logout.
9) Confirm that you want to logout.
How to log in to the system once you have your five-digit
lab ID number (this is the procedure you will use from now on):
1)
In
Name, please type your five-digit lab ID number.
2)
Next,
type your nine-digit University ID number as your password. Click on Log in.
3)
In
the User Log In window, click on Continue.
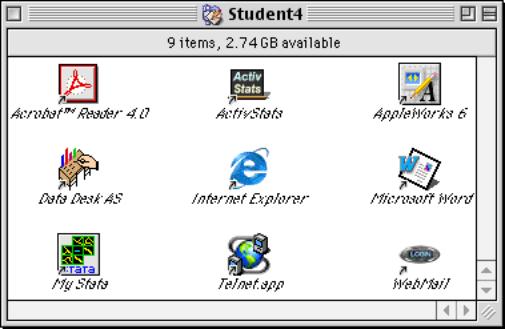
Now
youll see a monitor screen with several icons aligned to its right. Clicking twice on an icon will open it.
What are
these icons?
The
Macintosh HD icon contains various applications and documents having to do with
the hard drive of the computer you are on. However, you will rarely need to
access this.
The next
two icons are printers. If you have a file you want to print, you can drop and
drag it onto this icon and it will print on one of the printers in the back of
the room. You may print up to 100 pages each quarter. Once you exceed this quota, you will be charged for your printing
material.
The
Macintosh Manager icon contains system administrative items and is not
accessible.
The
Items for Students icon contains, as you might guess, items that might be
useful for students in any class that might use this lab.
The icon
with your Lab ID number is where your work will be stored. This should be the
first place to look for a file.
The
trash is where you drag and drop files that you wish to delete. Items will remain
in the trash until you empty it, and forever after they are gone. To empty
the trash, select Empty Trash from the Special menu item at the top of your
screen.
Lets
continue
4)
Double
click on the icon that shows your lab ID number.
5)
Next
double click on the icon called Items for Student.
6)
You
should see a folder called Student, where youll find the icons for several
programs available in your Mac computer, including Stata (a statistical
software), Internet Explorer (through which you access the Internet),
AppleWorks and Microsoft Word (two different word processors), and WebMail,
which you can use to send and receive emails with attached files.
We will
be using Stata in this class to analyze data and to assist in understanding
some statistical concepts. Stata is a
very sophisticated and powerful computing package that requires two basic
ingredients in order to run: data and
commands. Throughout the quarter, you
will learn increasingly complex Stata commands. You will also learn several different ways to get data into
Stata. This first Lab will teach you
some commands concerned with entering data by hand.
Getting Data into Stata
To Start Stata
Double
click on My Stata found under the Items for Student folder. You should see
next four windows. They are called Review, Variables, Stata Results, and
Command.
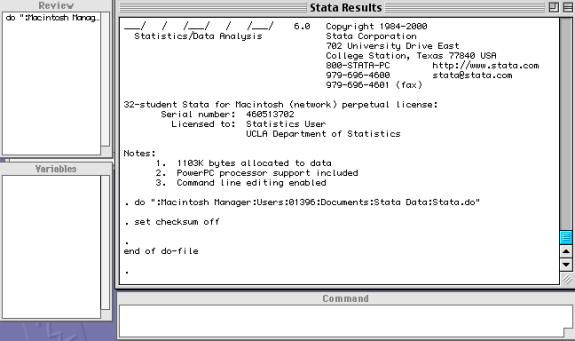
In the
Command window, type edit and press Return.
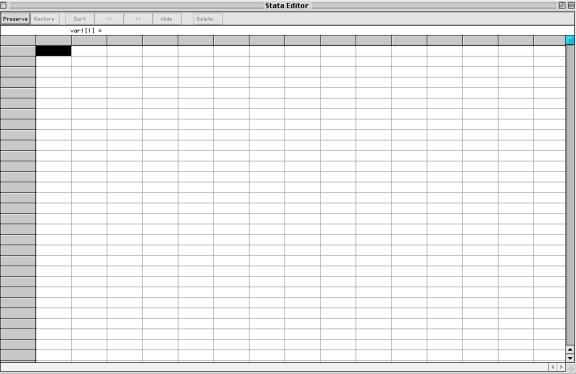
Youll
see the Statas editor, which is like a spreadsheet. The columns correspond to
variables and rows to observations. You
navigate by clicking on a cell, or by using the arrow keys.
Activity 2: Entering
Data by Hand
This is
not something you want to do too often. It can be tedious and tiring. But sometimes, particularly if youve collected
your own data, this is the only way to go. Stata has a spreadsheet editor that
makes this as easy as possible, and allows you to fix typing mistakes.
Exercise:
A
Statistics professor gave a survey to an upper division class. He asked each
student for their height (in inches), their sex (m or f), and the number of
days since their last alcoholic drink. If they had never had an alcoholic drink
they were to enter never. The results for a non-random sample of seven of
these students are shown below. Each row represents one students response to
these three questions. Notice that one female student chose not to answer the
question about her height. Also, an n in the alcohol column means the student
answered never.
height sex alcohol
68 m n
78 m 5
75 m 5
63 f 3
66 m 40
- f n
60 f 18
Please enter this raw data into the Stata
spreadsheet. Note: Do not enter the variable names height,
sex, and alcohol in the spreadsheet editor. You will name the variables in a different way.
Tip: You
skip a cell by pressing on Return on
your keyboard.
Give names to the
variables:
Once you
have typed your data into the Statas spreadsheet, it is time to assign names
to your variables.
1)
Double
click on the first cell of the very first row of the spreadsheet (the darkened
one). Youll see a box called Stata Variable Information. For now, you should
be concerned only with entering the information under Name. In this case, you
should type height
2)
Next,
click on OK.
3)
Now
repeat the same procedure when assigning names for the variables sex and
alcohol.
Save your file:
Now that
youve spent time entering data by hand, youll want to save it or else youll
have to re-enter it the next time you want to analyze the data.
1)
First,
you should close the spreadsheet by double clicking on the small box located on
the top left side of the spreadsheet window. Once youve done that, you should
see Statas four initial windows again.
2)
Go to
File and click on Save. Youll see
a box where youll be asked to name your file. Usually, researchers choose
names that represent the dataset. In
this case, you might choose something like class, but the name is totally up
to you. When you type it in, make sure
that you keep Statas file extension .dta before you click on Save.
3)
To
exit Stata, go back to File and click on Quit.
Note: This activity is just
for practice. You do not need to turn anything in to your instructor.
Activity 3: Sending lab files to your home computer
There
may be times that youd like to work on your statistics labwork on another
computer. Youll notice that there are
no disk drives on these iMacs, so it will be impossible to save your files to a
disk. Instead, you can email the
relevant files to yourself and have access to them from any computer. To do that:
1)
Double
click on the folder Items for Student.
2)
Next,
double click on the WebMail icon. Youll see a window that looks like the
following one:
3)
Enter
your Bruin Online ID, and your password. Notice that this is the same
information you normally use to check your emails through Eudora.
4)
Click
on Login.
5)
Once
you open the WebMail window, click on New.
6)
Youll
see a window where you should type the email address to which you want to send
your lab files. There you have both the options to type in your message and to
attach up to three different files at a time.
Attach files to your
message:
7)
Click
on Browse.
8)
Highlight
the folder with your Lab ID number on it. Then click on Open.
9)
Youll
see next all the files that you have used in your lab section.
10) To open a Stata file, double click on the Stata directory.
11) Highlight the Stata file you want to send in your email, and click
on Open. You should see the WebMail window back on your screen.
12) Now just click on Send Message.
13) To exit WebMail, go to File and
click on Quit.
To make
sure that this procedure works, email the Stata file containing the practice
dataset to yourself. Then check your
email before next weeks lab to make sure that you received it. Youll be able to open a Stata file on any
computer on which Stata is installed.
Log Out
·
Do NOT forget to
logout from your computer before you leave the lab. Otherwise, other people
will not only be able to access your personal files but they will be able to
print documents by charging on your paper quota! To logout, go to the Finder (either hold the mouse button down
while the cursor is in the upper right-hand corner of the screen or click once
on the desktop background). Select
"log out" under the File menu at the top of the screen. Do NOT
select shutdown!
Computer Lab Schedule
If you wish to work in
the lab beyond the time of your section meeting, you may check the lab schedule
to know when the room is available. The course schedule for the Stat lab is
posted on the Statistics Department home page @ http://www.stat.ucla.edu, under
Calendar.
END OF SECTION